如何使用极狐GitLab CI/CD 构建镜像并推送到 Azure Container Registry?
 小马哥
小马哥
azure 有自己的容器镜像仓库服务 acr(azure container registry)。用户可以构建容器镜像之后推送到 acr 中。当然,还可以直接借助极狐GitLab CI/CD 实现容器镜像构建和推送的自动化。下面演示如何使用极狐GitLab CI/CD 构建容器镜像并自动推送到 acr 中。
创建 ACR 服务
首先,需要在 azure 上创建一个 acr 服务。创建成功之后,可以看到对应的信息:
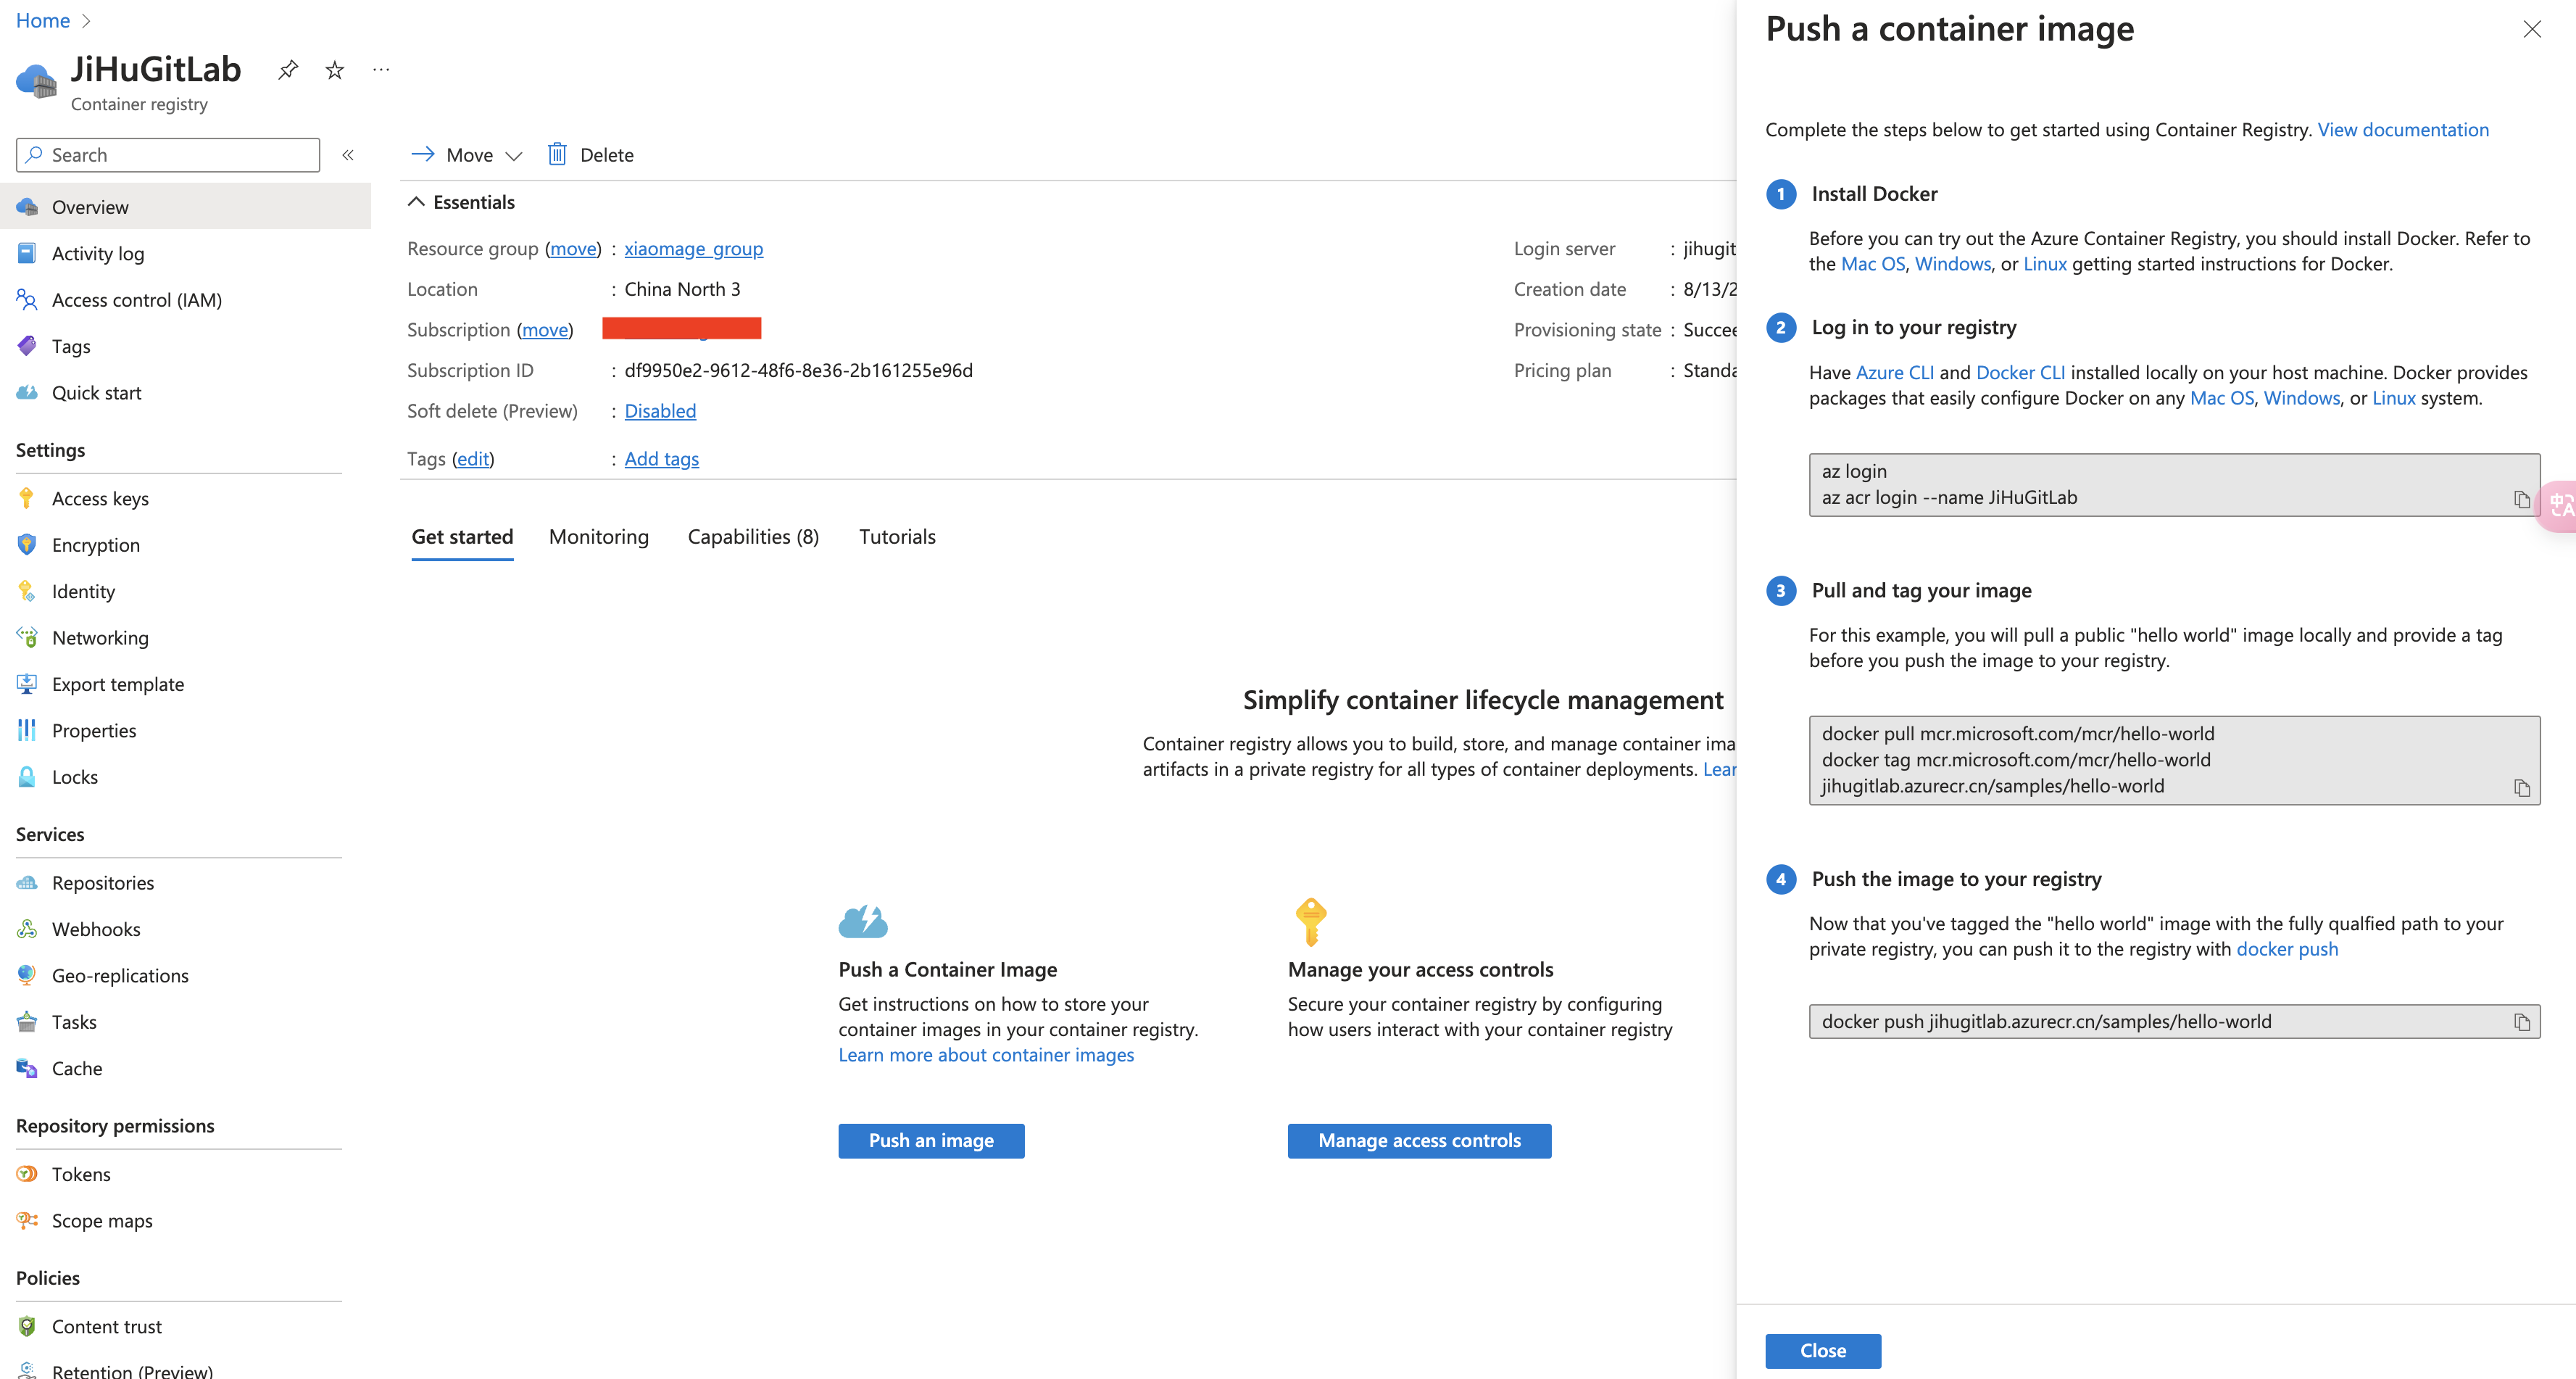
acr 详情页面
镜像仓库的登录地址为 jihugitlab.azurecr.cn。点击页面上的 Push an Image 可以看到右侧的登录方法:
az acr login --name JiHuGitLab
Uppercase characters are detected in the registry name. When using its server url in docker commands, to avoid authentication errors, use all lowercase.
Login Succeeded
之后就可以使用 docker pull、push等命令了:
docker pull mcr.microsoft.com/mcr/hello-world
docker tag mcr.microsoft.com/mcr/hello-world jihugitlab.azurecr.cn/samples/hello-world
如果要使用 docker login的方式登录 acr,需要在 Access Key 中找到对应的用户名和密码:
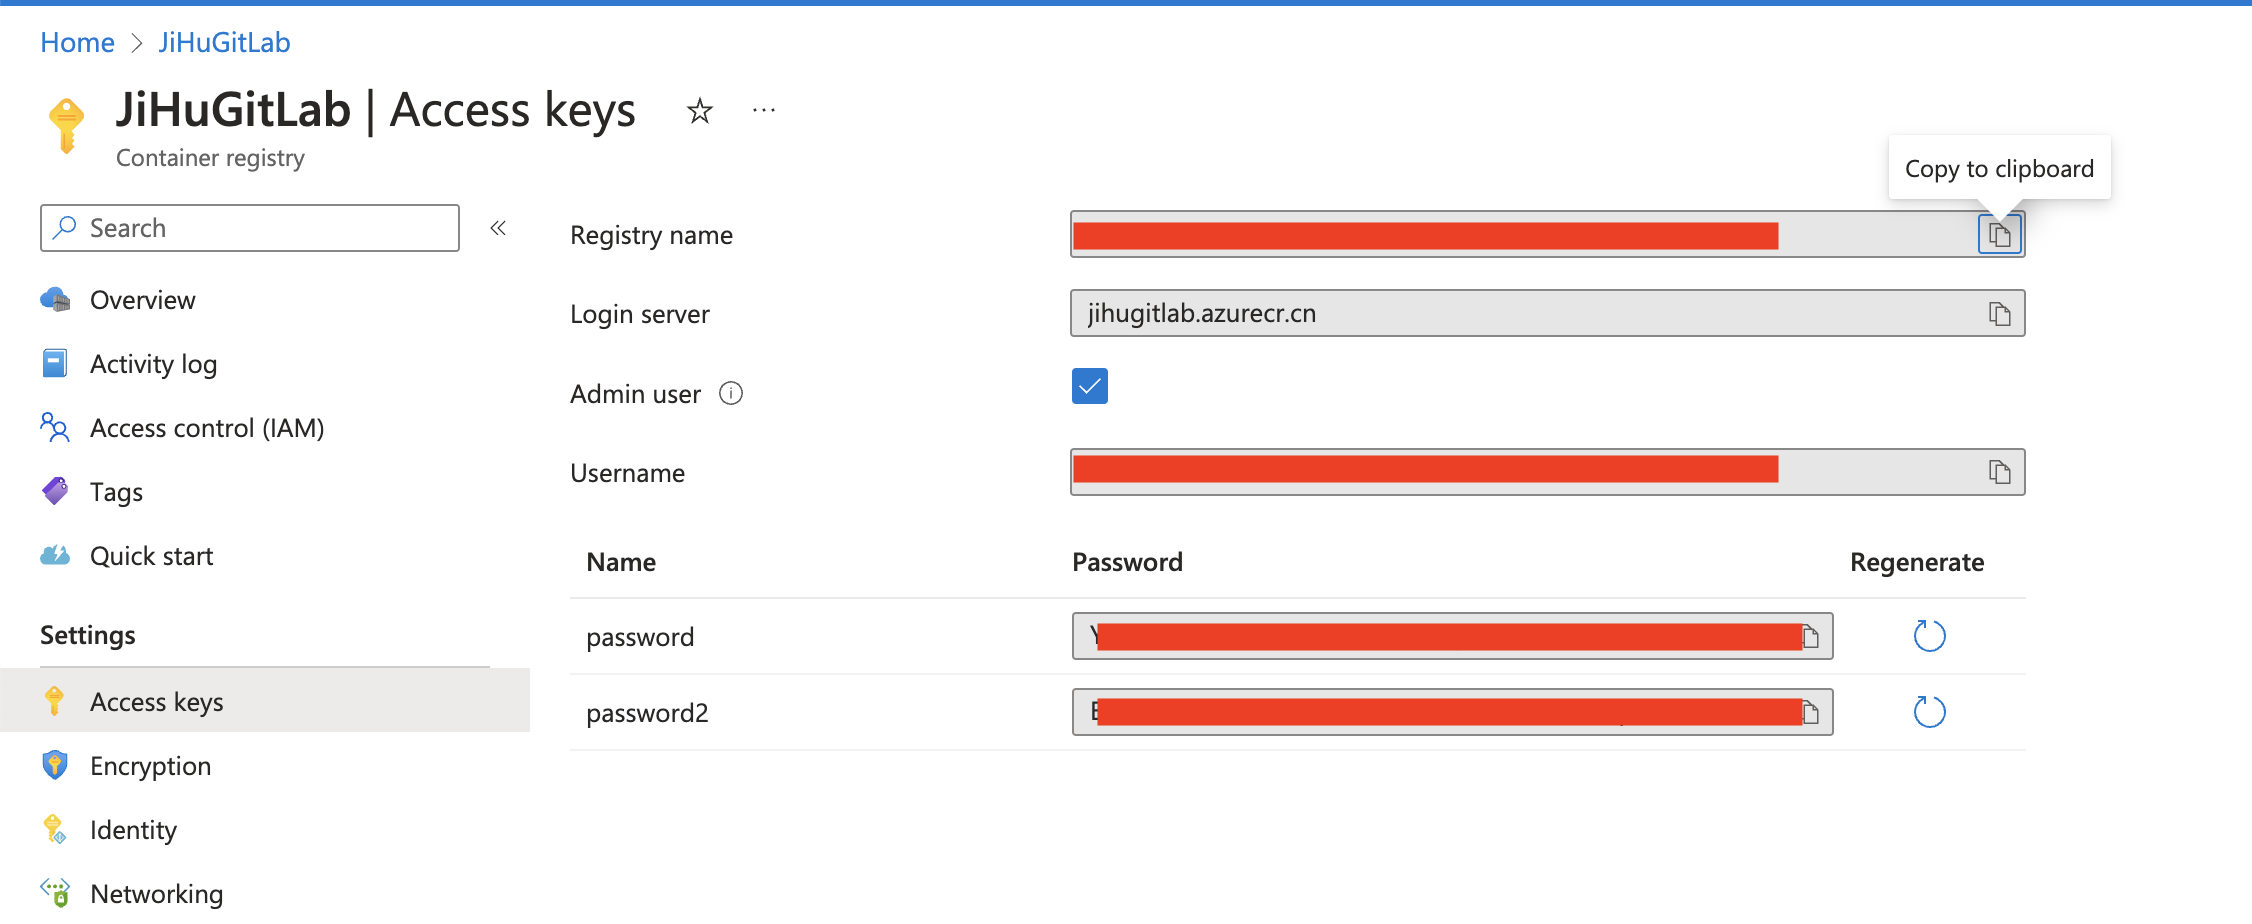
Access key 页面
同样可以登录成功:
docker login jihugitlab.azurecr.cn
Username: JiHuGitLab
Password:
WARNING! Your password will be stored unencrypted in /root/.docker/config.json.
Configure a credential helper to remove this warning. See
https://docs.docker.com/engine/reference/commandline/login/#credentials-store

Login Succeeded
和极狐GitLab CI/CD 集成
一般来讲,在极狐GitLab CI/CD 中构建容器镜像的 .gitlab-ci.yml文件内容如下:
build:
  image: docker:latest
  stage: build
  services:
    - docker:20.10.7-dind
  script:
    - docker login -u "$CI_REGISTRY_USER" -p "$CI_REGISTRY_PASSWORD" $CI_REGISTRY
    - docker build -t $CI_REGISTRY_IMAGE:1.0.0 .
    - docker push $CI_REGISTRY_IMAGE:1.0.0
只需要将环境变量 CI_REGISTRY_USER、CI_REGISTRY_PASSWORD、CI_REGISTRY修改为 acr 中的数值即可。也就是将这些变量都以环境变量的形式存储到极狐GitLab CI/CD 变量中(项目 --> 设置 --> CI/CD --> 变量):
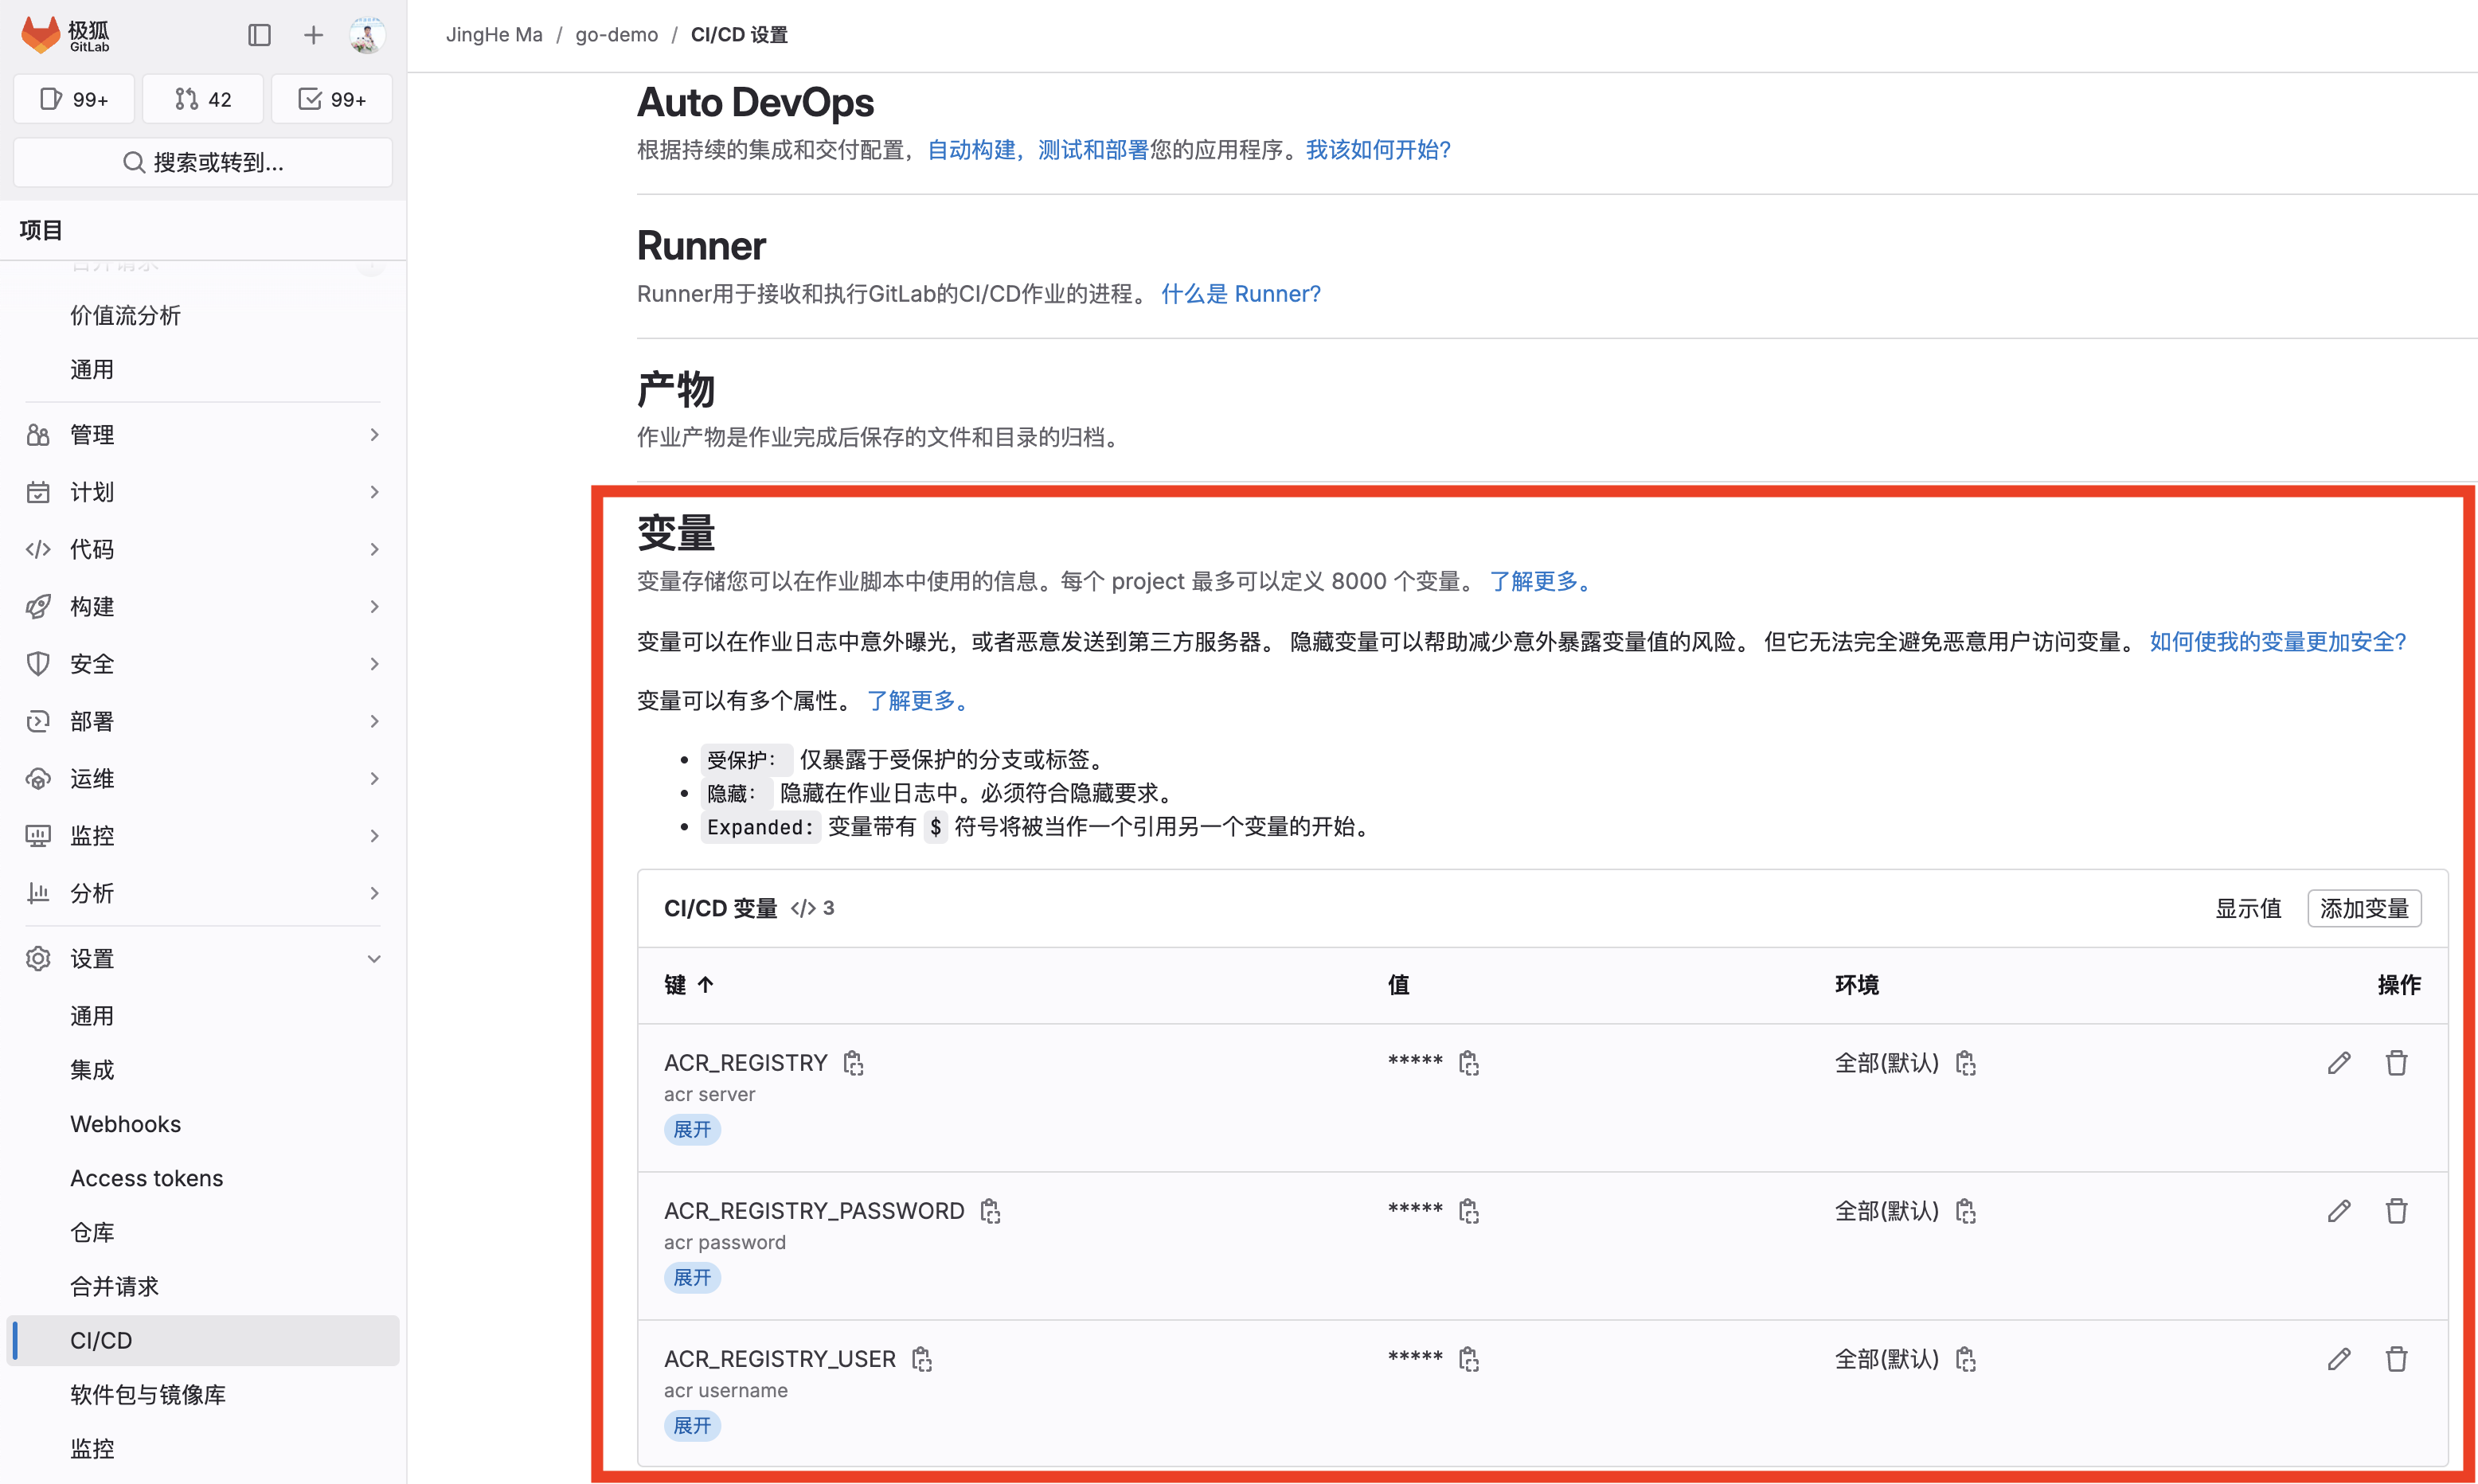
极狐GitLab 添加 CI/CD 环境变量
因此,.gitlab-ci.yml文件中的内容如下:
build:
  image: docker:latest
  stage: build
  services:
    - docker:20.10.7-dind
  tags:
    - gitlab
  script:
    - docker login -u "$ACR_REGISTRY_USER" -p "$ACR_REGISTRY_PASSWORD" $ACR_REGISTRY
    - docker build -t $ACR_REGISTRY_IMAGE:1.0.0 .
    - docker push $ACR_REGISTRY_IMAGE:1.0.0
出发 CI/CD 流水线之后,可以查看构建结果:
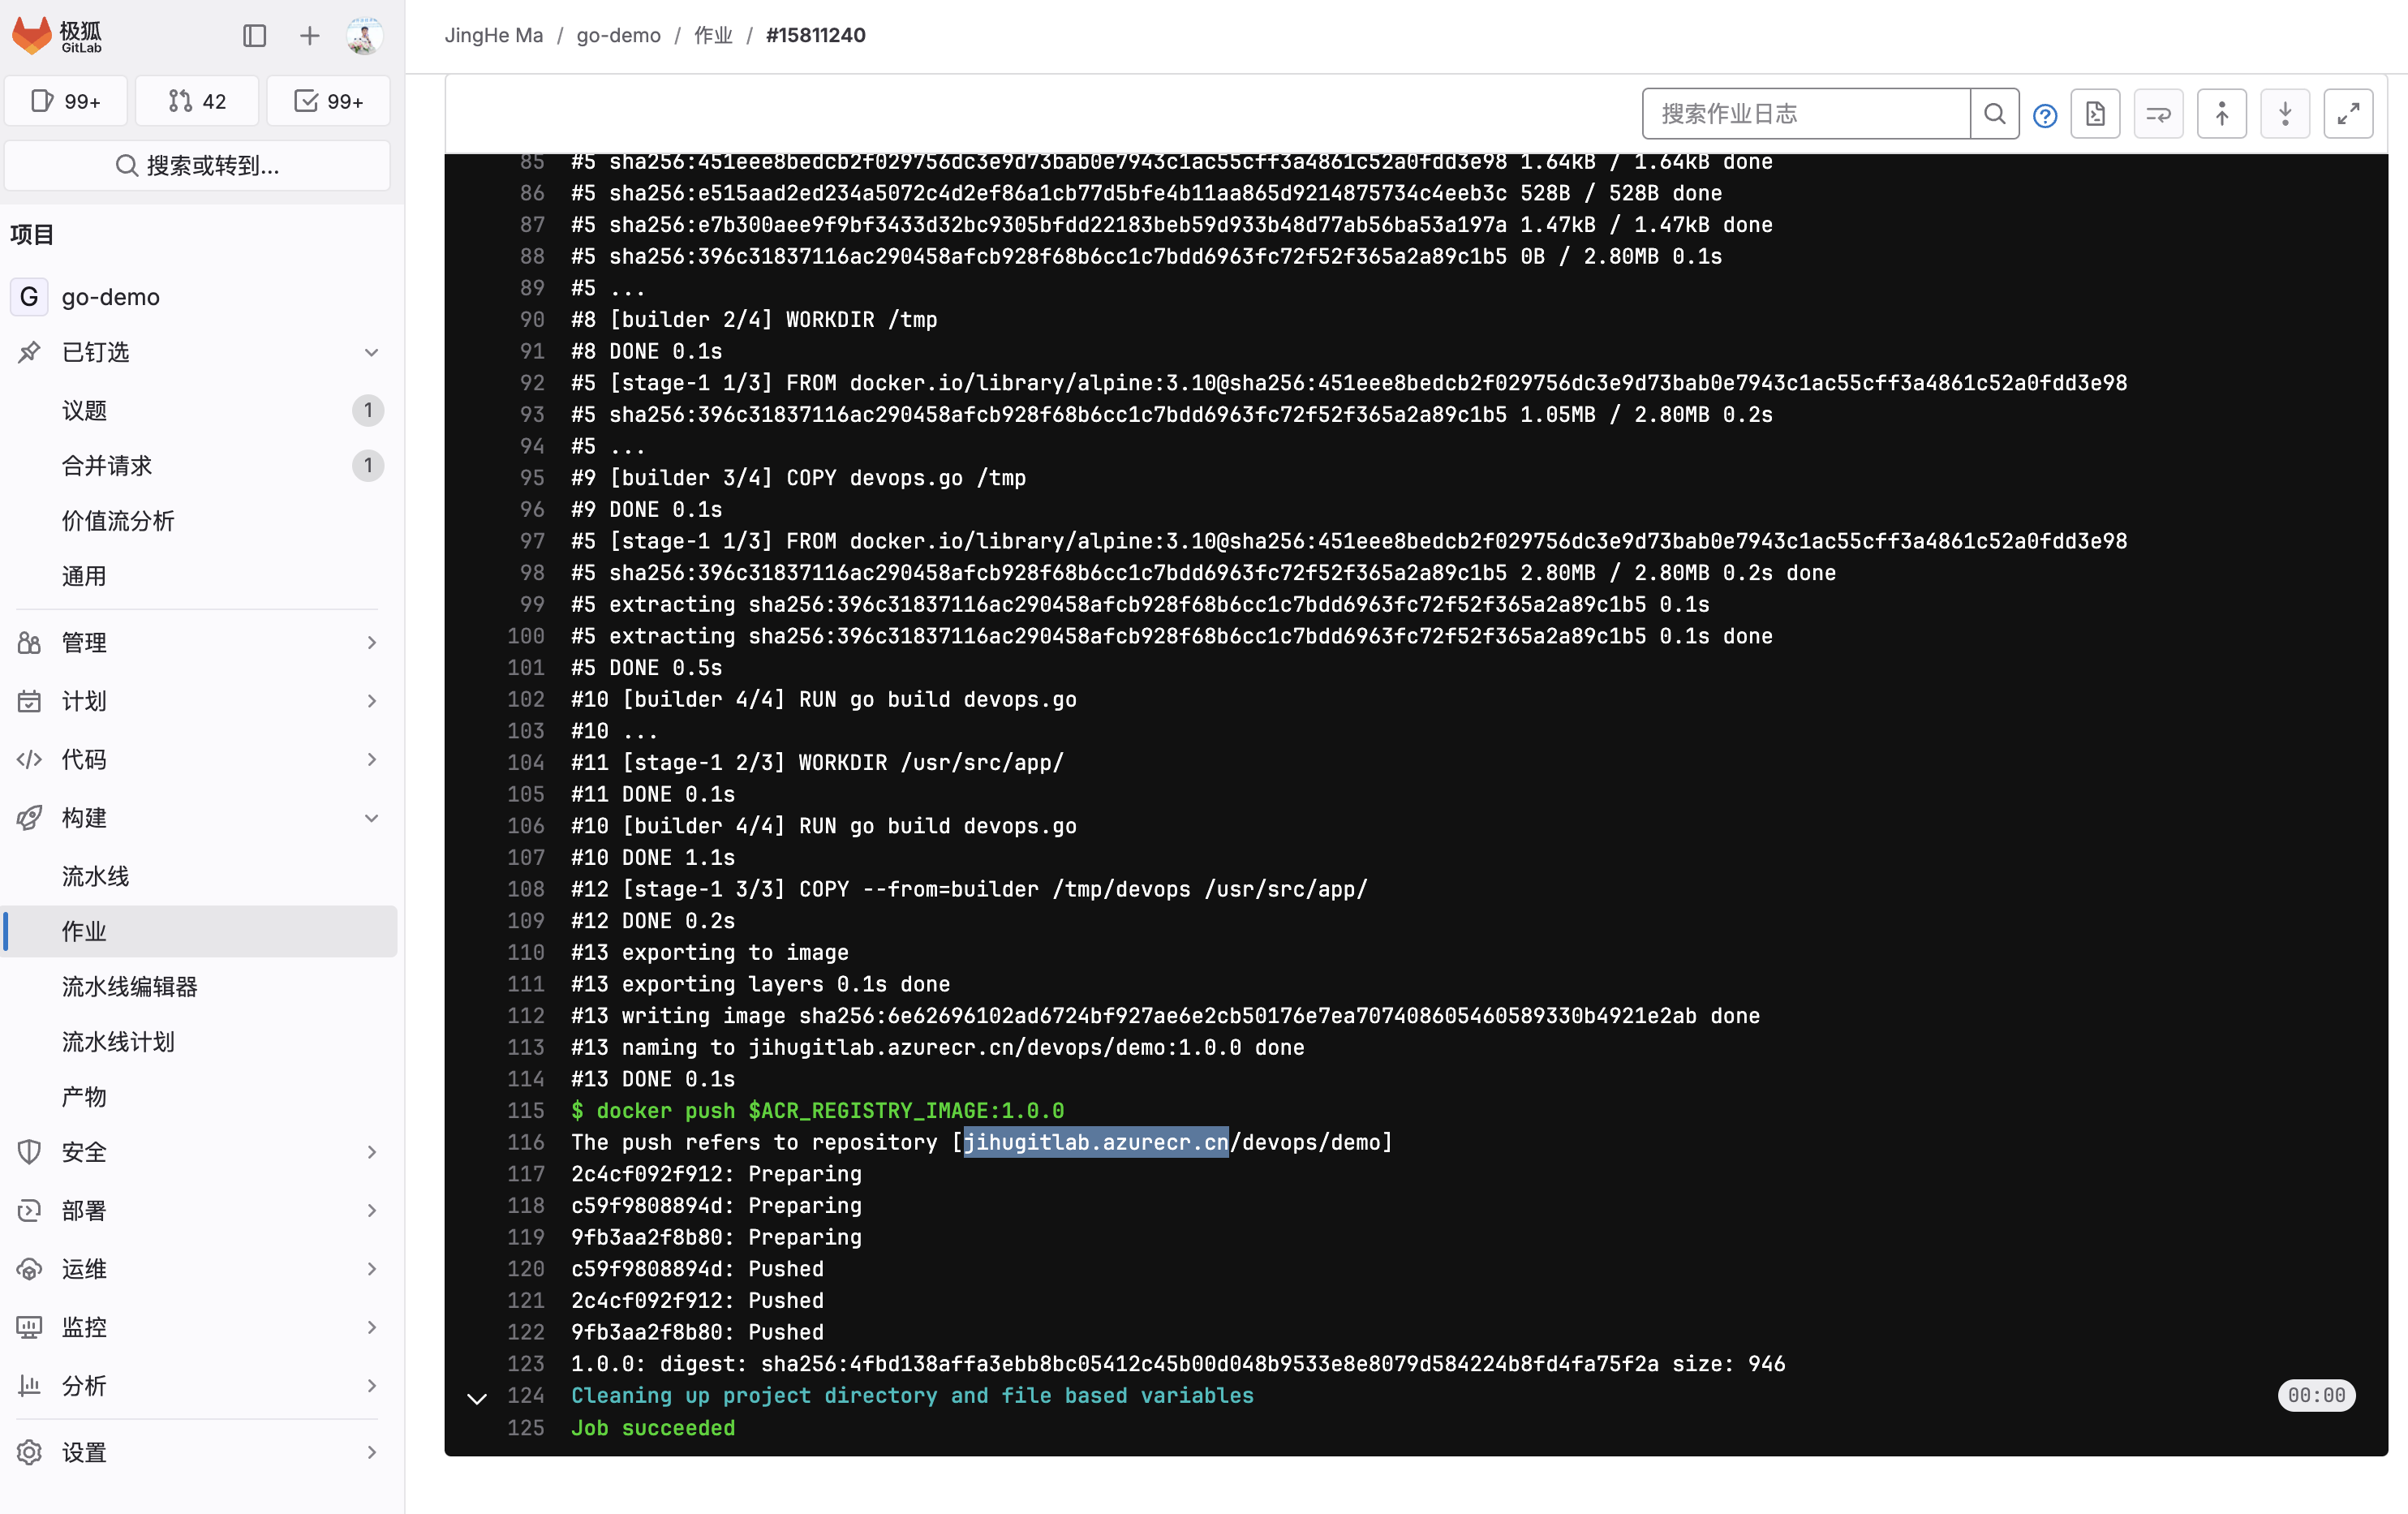
极狐GitLab CI/CD 流水线构建页面
镜像构建成功,并且推送到了 acr 中,可以在 acr 中查看。在 acr 的 repositories 中看到推送成功的镜像:
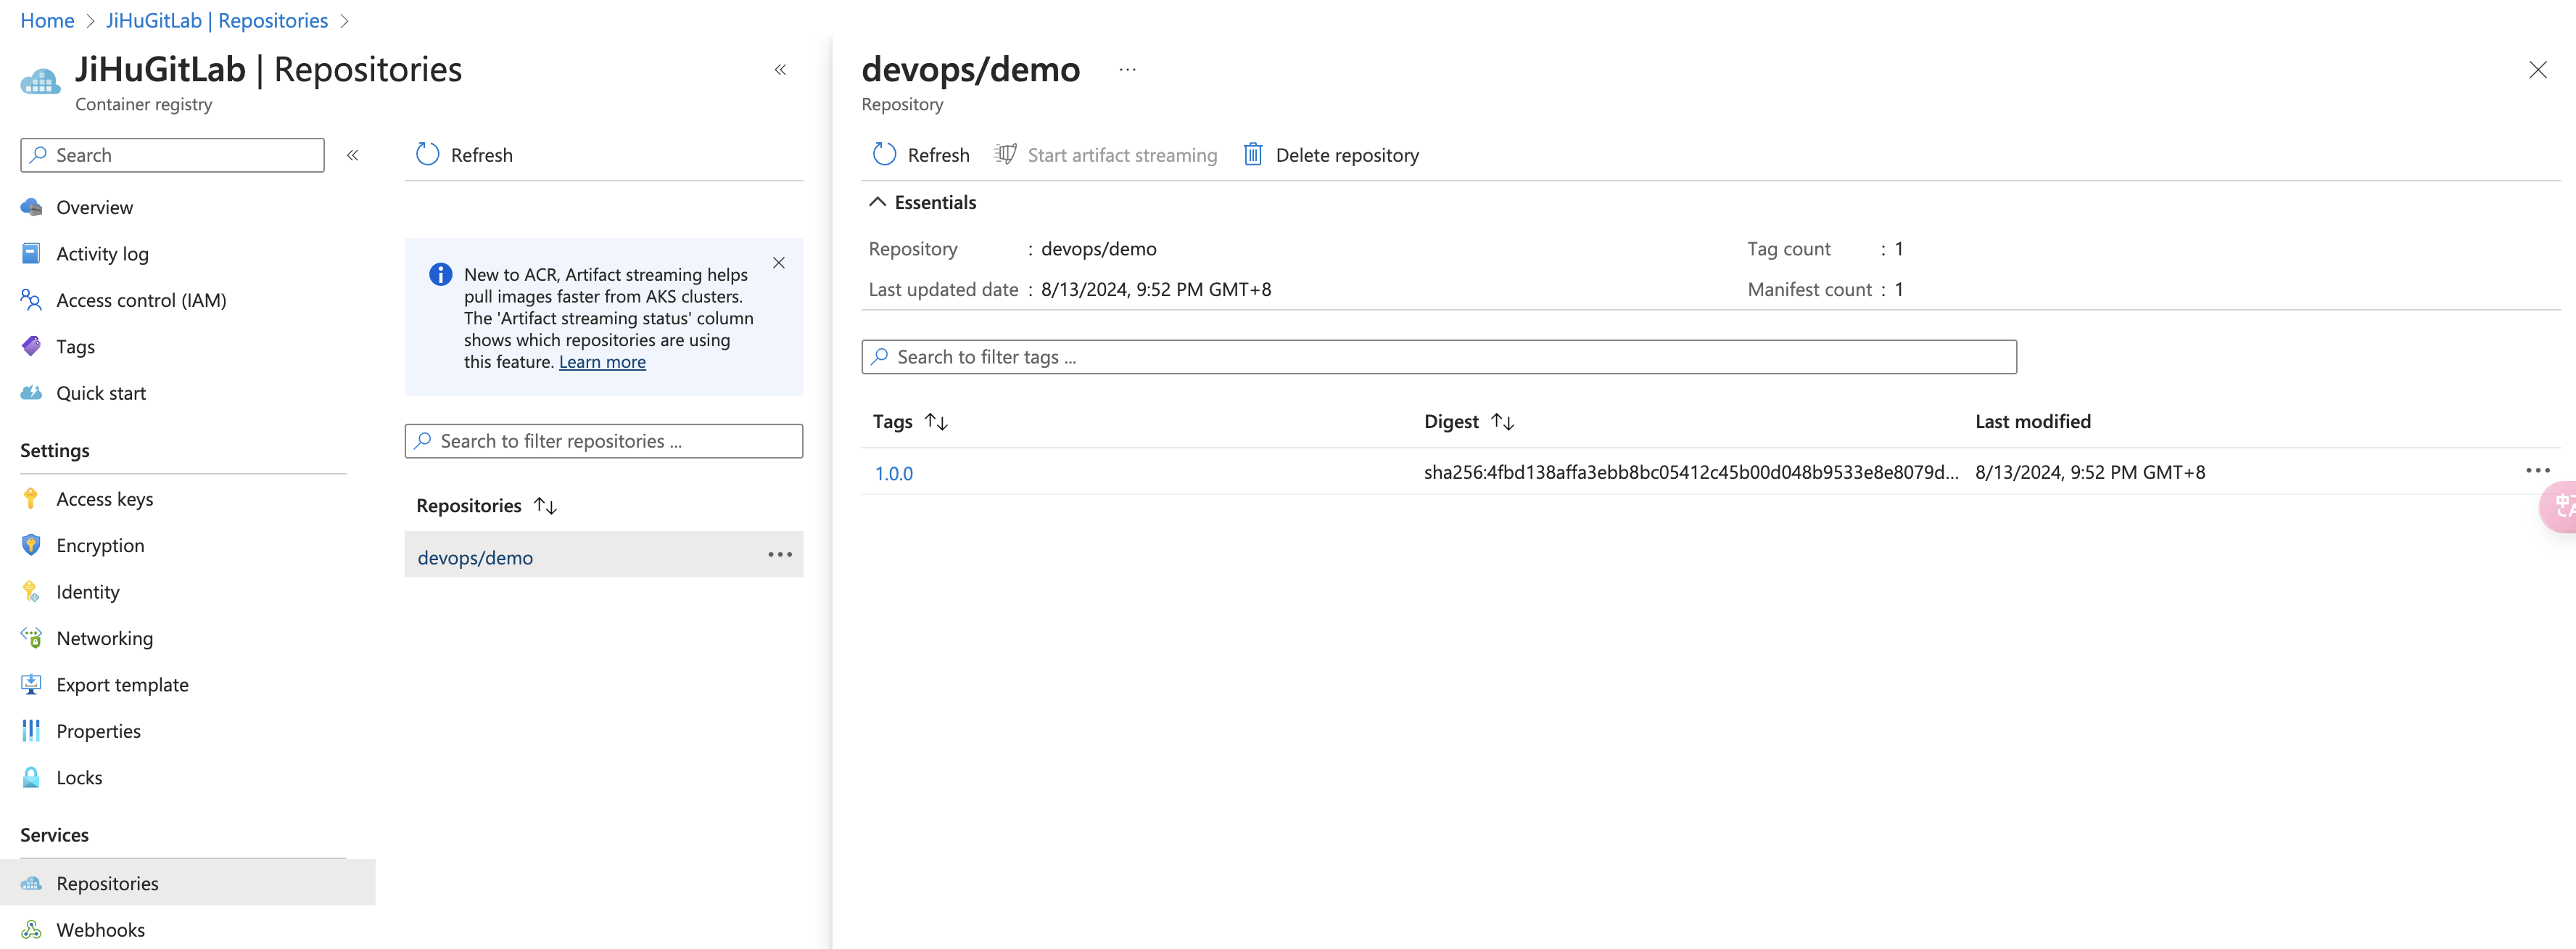
Azure container registry 页面
高阶体验,用 CI/CD Component 简化构建过程
为了提高 CI/CD 流水线的复用性、易用性,极狐GitLab 从 16.0 引入了 component 功能,16.1 引入了 catalog 功能。对于这两个功能的详细介绍可以参考过往的技术文章极狐GitLab CI/CD Component & Catalog 功能揭秘。
对于上面的流程,可以采用直接引用 component 的方式来简化 CI/CD 流水线的构建。在极狐GitLab SaaS(JihuLab.com)上点击搜索或转到 --> 探索 --> CI/CD 目录,可以看到已经发布的 CI/CD Component:

极狐GitLab CI/CD 目录页面
第一个 docker-image-build就是构建容器镜像,并将其推送到镜像仓库的 component:
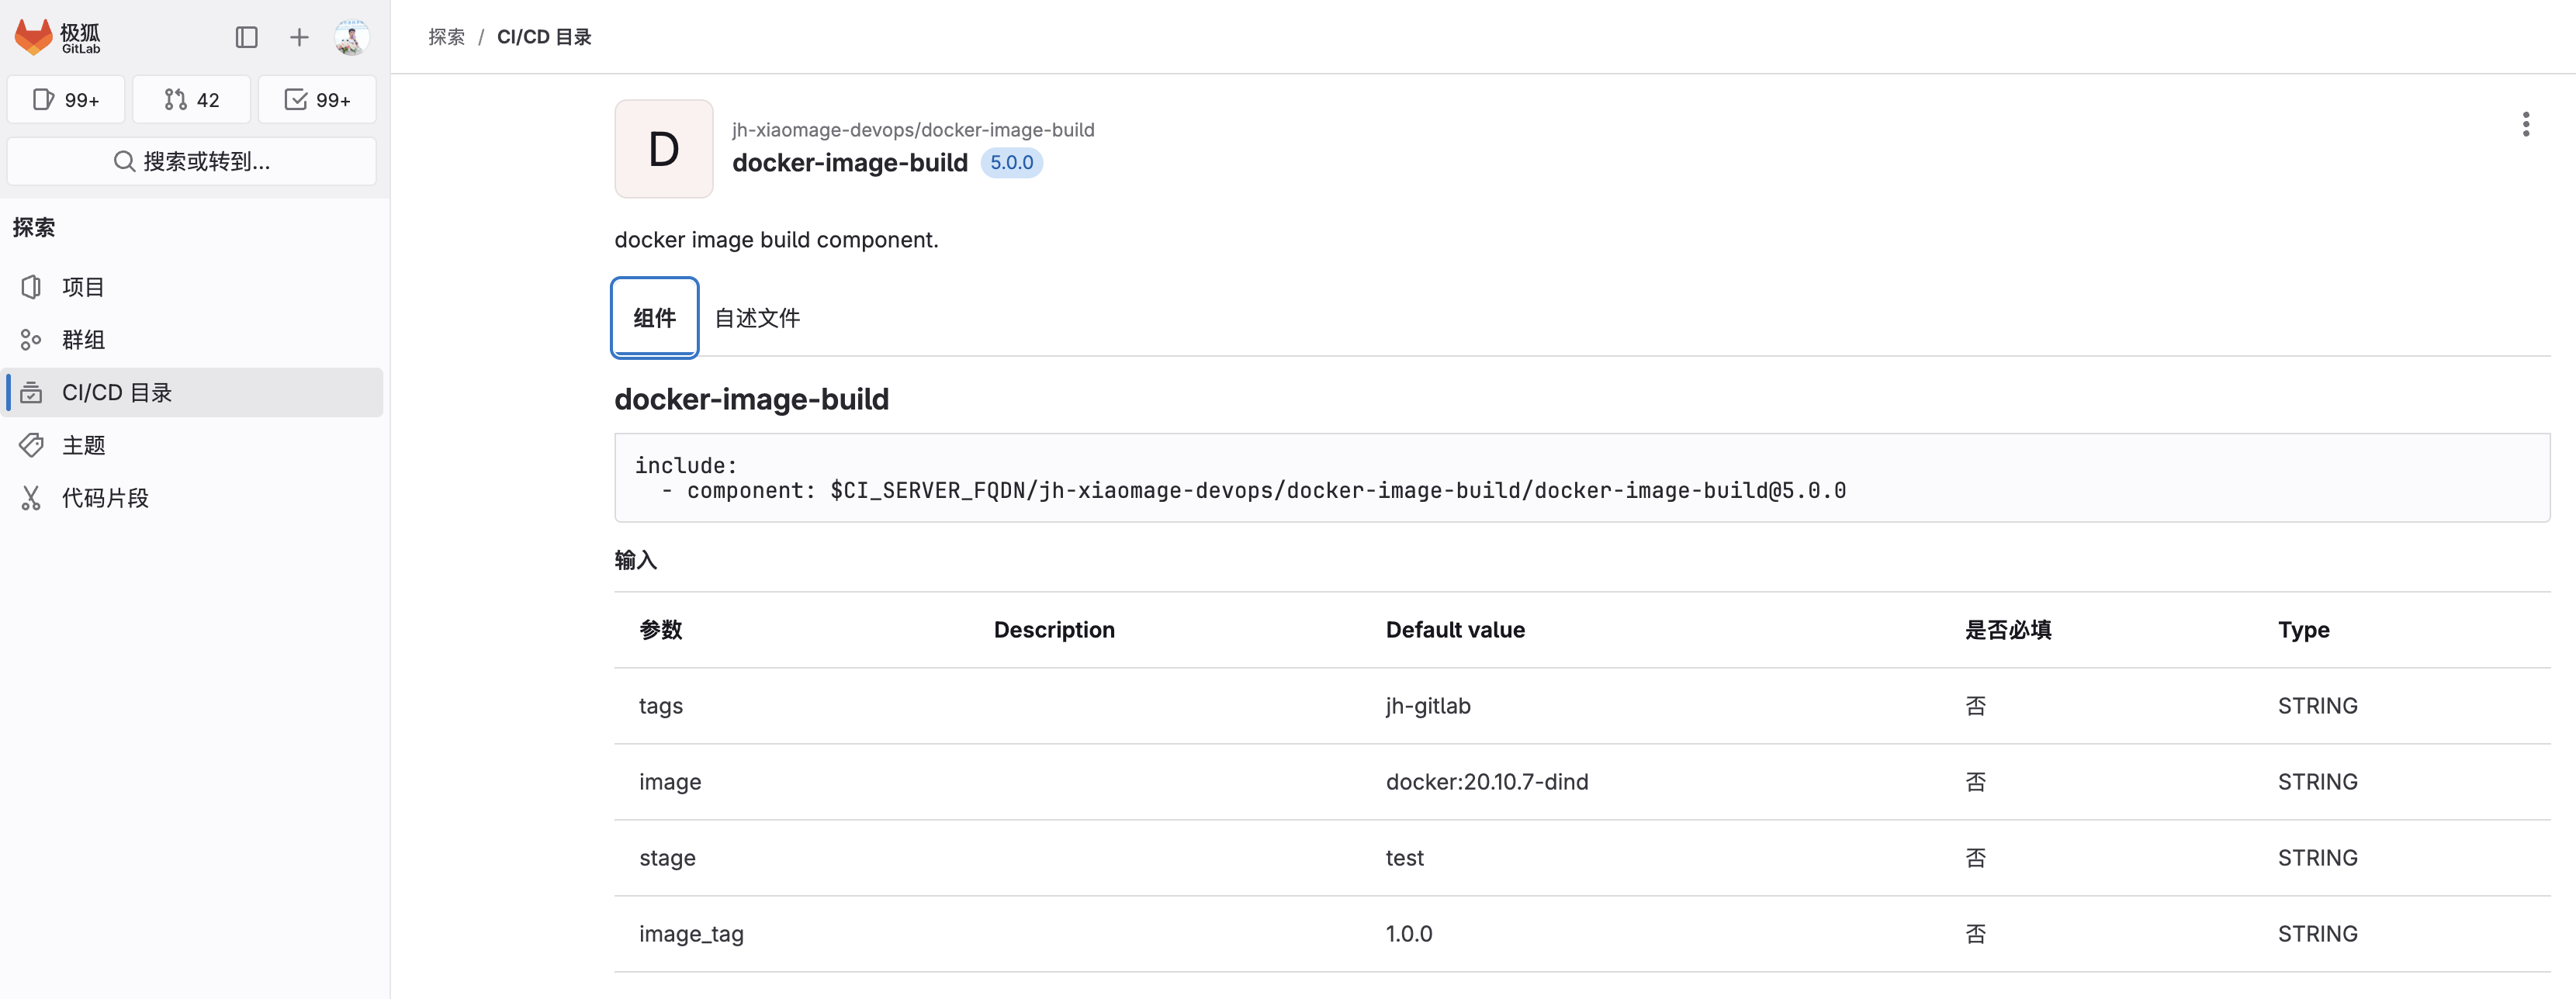
极狐GitLab CI/CD Component 页面
Component 的实际内容如下:
spec:
  inputs:
    stage:
      default: test
    image:
      default: docker:20.10.7-dind
    image_tag:
      default: 1.0.0
    tags:
      default: jh-gitlab


---
component-job-build-image:
  image: $[[ inputs.image ]]
  stage: $[[ inputs.stage ]]
  tags:
    - $[[ inputs.tags ]]
  script:
    - docker login -u "$ACR_REGISTRY_USER" -p "$ACR_REGISTRY_PASSWORD" $ACR_REGISTRY
    - docker build -t $ACR_REGISTRY_IMAGE:$[[ inputs.image_tag ]] .
    - docker push $ACR_REGISTRY_IMAGE:$[[ inputs.image_tag ]]
在项目中的引用方式为:
include:
  - component: jihulab.com/jh-xiaomage-devops/docker-image-build/docker-image-build@5.0.0
    inputs:
      stage: build
      image: docker:20.10.7-dind
      tags: gitlab
      image_tag: 2.0.0
然后触发流水线,直接查看构建结果:
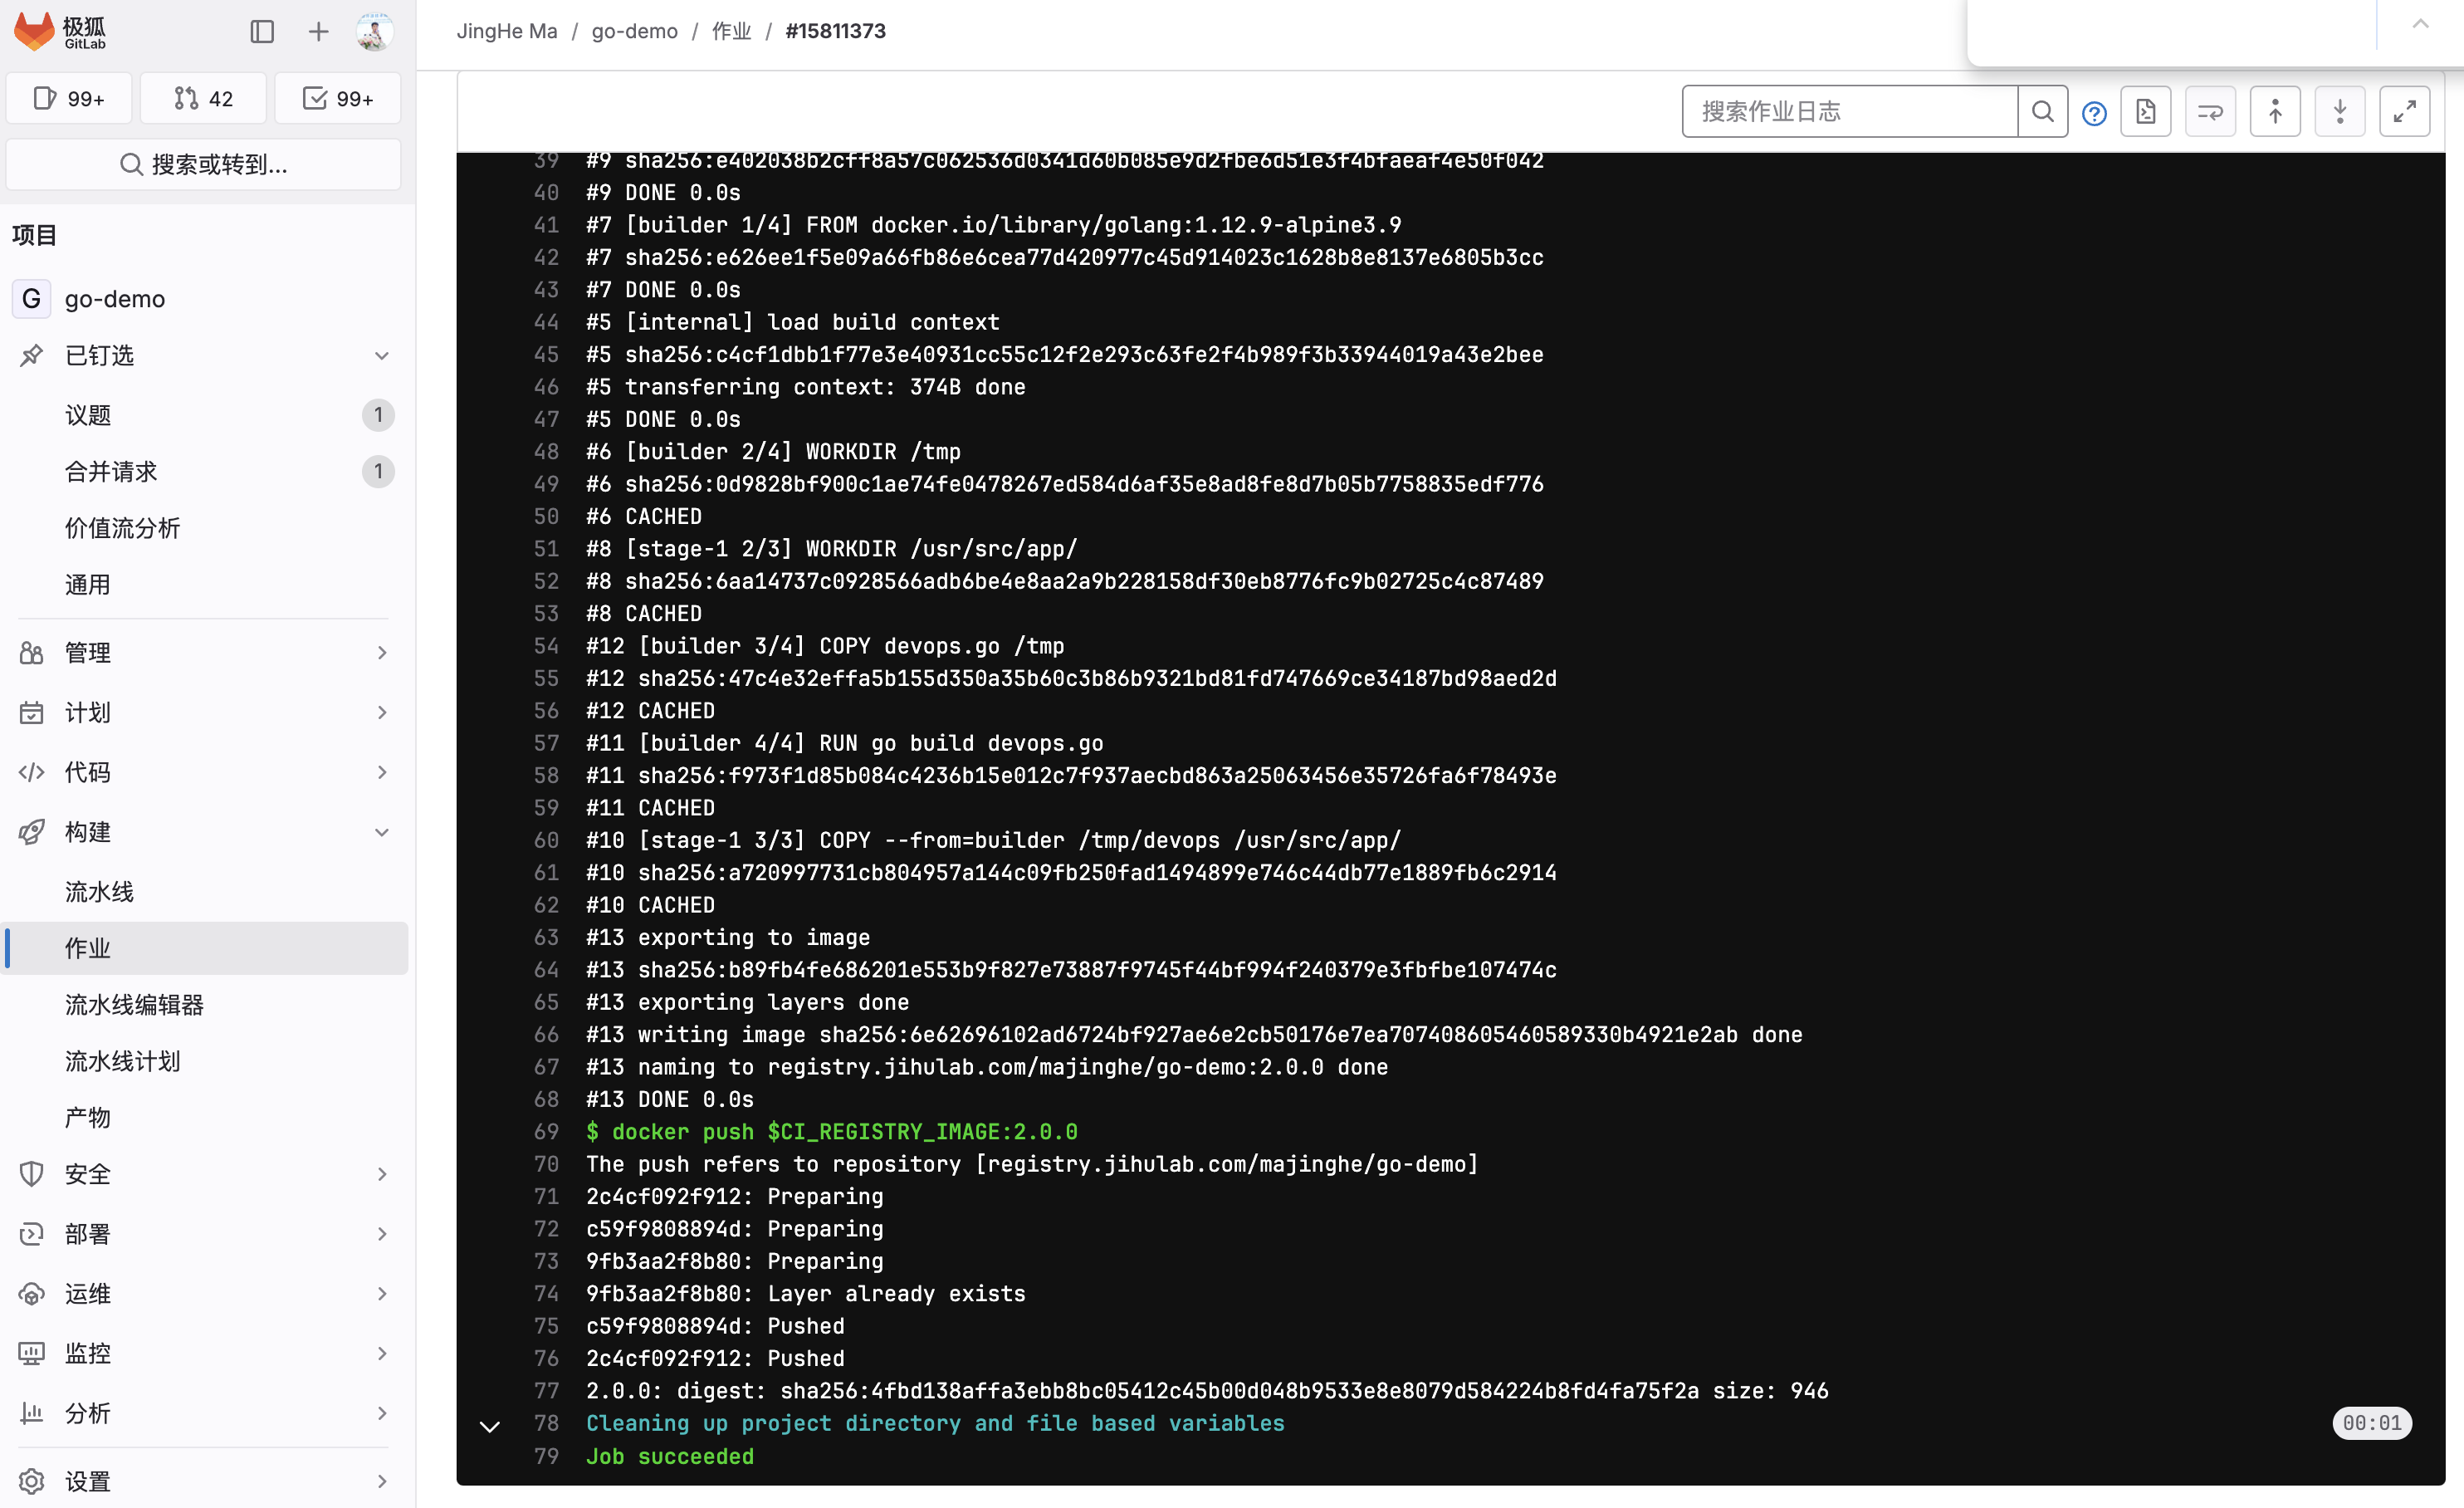
极狐GitLab CI/CD 流水线构建页面
然后在 acr 上查看 tag 为 2.0.0的镜像是否被推送过去:
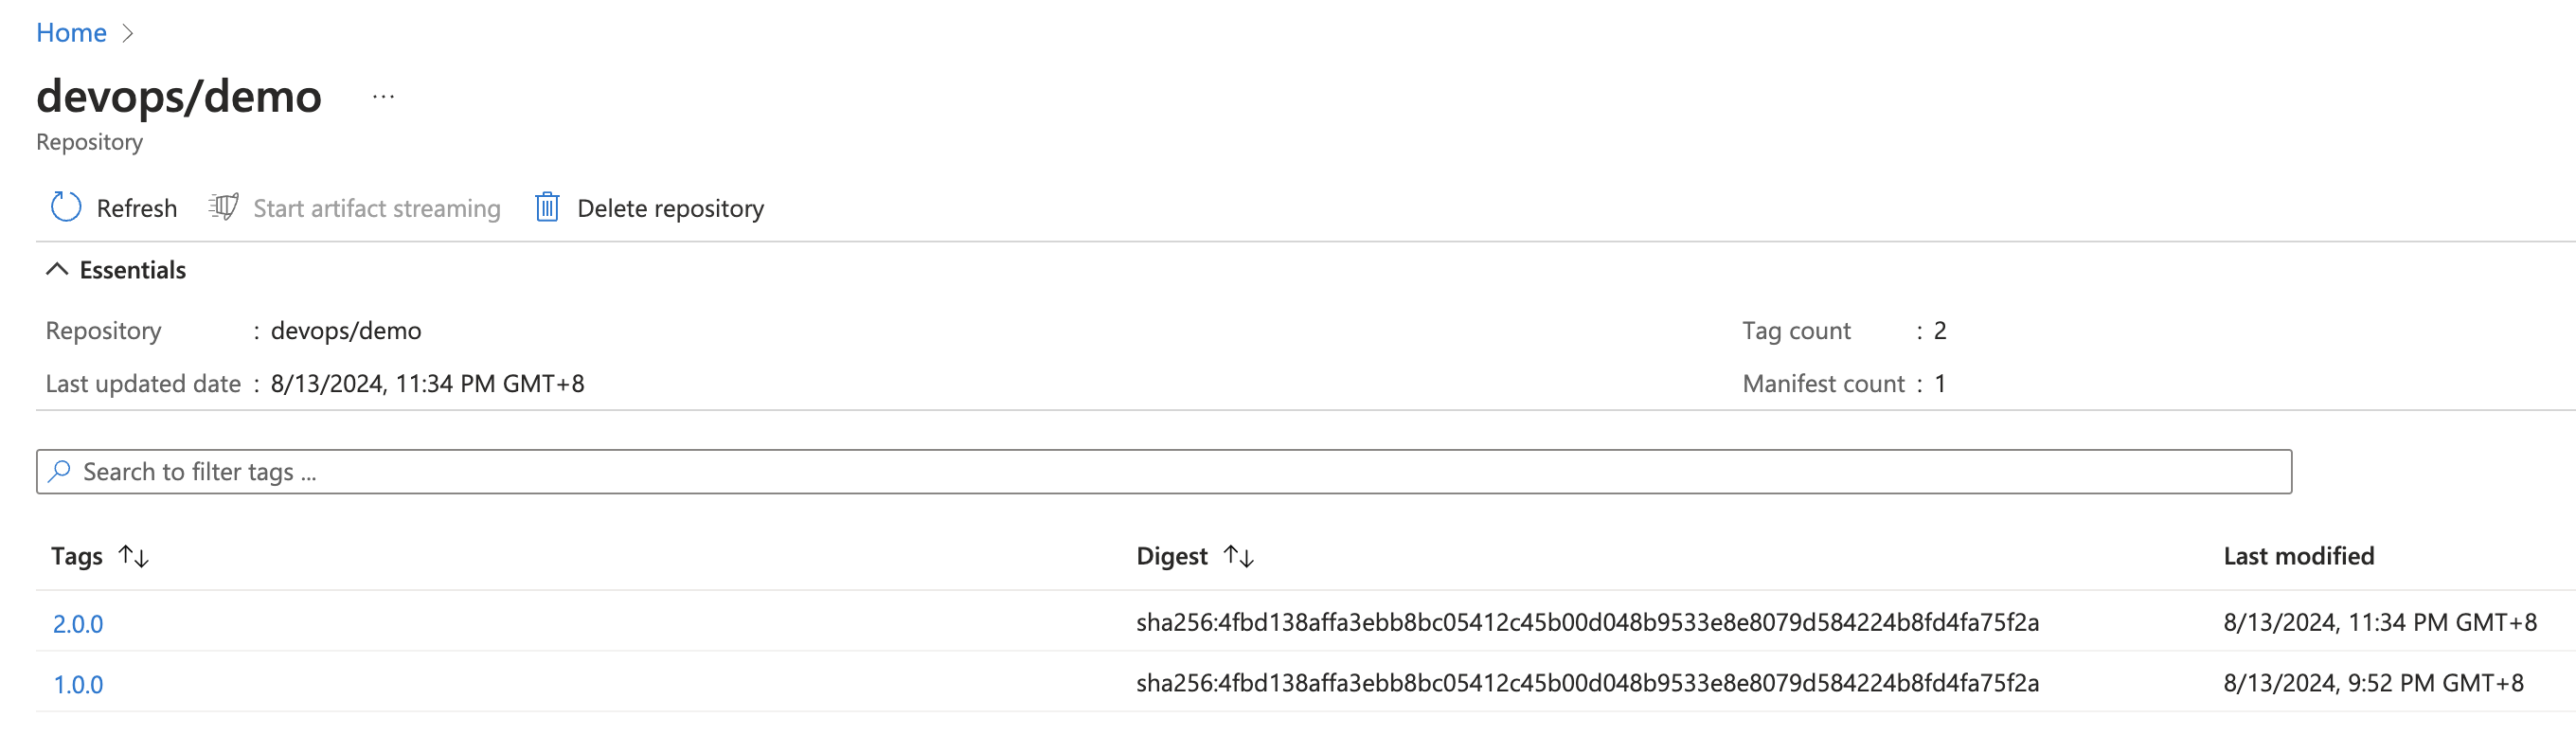
Azure container registry 页面
2.0.0的镜像已经存在于 acr 中了,说明引用 component 将镜像构建并推送成功。
 小马哥
小马哥